Table of contents
- Why independent restaurants can't afford to skip online ordering
- Direct ordering vs. third-party aggregators: which should you set up first?
- Step 1: Choose a POS system that works with your kitchen, not against it
- Step 2: Build a menu designed for online, not just copied from your in-house menu
- Step 3: Configure hours, prep times, and pickup or delivery fulfillment settings
- Step 4: Add your ordering link to your website and Google Business Profile
- Step 5: Promote your ordering link before and after launch
- Your first two weeks live: what to monitor and what to adjust
- The savings stack up with every repeat order you keep off the aggregator
- Frequently asked questions about how to set up online ordering
You're leaving money on the table right now. Not because your food isn't good enough, but because customers who search for your restaurant can't find a way to order. Nearly 75% of all restaurant traffic now happens off-premises, according to the National Restaurant Association. If your restaurant doesn't have a working ordering link somewhere visible, those customers don't wait. They order from whoever is one tap away.
The good news: getting this right is not a software project. It's a checklist. Work through every step below, from choosing the right POS system to promoting your link and watching your first weeks of live orders.
Key insights
- Disconnected order systems, not platform choice, are the number-one cause of operational failure after an independent restaurant launches an online ordering system. If web orders do not flow automatically into your kitchen, you have created more labor, not more revenue
- Your online menu should be a curated edit of your in-house menu, not a copy-paste. Items that do not travel well damage your star rating before you build it, and a lower rating costs you more customers than a shorter menu ever will
- Most independent restaurants see their first meaningful online ordering volume in weeks three through six, not day one. Promotion compounds; setup does not. Treat your ordering link like a new employee: it needs to be introduced to every customer, repeatedly, across every channel you have
- A customer who orders through your direct channel twice a month at $35 saves you roughly $139 per year in aggregator commission compared to the same customer ordering through a 20% commission app, after accounting for your own payment processing cost. The five steps in this guide are a one-time investment; the savings repeat with every order
Why independent restaurants can't afford to skip online ordering
Here's the competitive reality: if a customer searches your restaurant name on Google and can't tap an “Order Now” button, they don't call you. They order from whoever ranks beside you. That shift toward off-premises ordering is permanent.
Setting up online ordering feels intimidating. You might worry it will create kitchen chaos, require technical skills you don't have, or lock you into fees you can't afford. None of that has to be true. Treat the rest of this as a checklist. Each step is specific, actionable, and designed to get you live without disrupting what's already working.
Direct ordering vs. third-party aggregators: which should you set up first?
Third-party aggregators (DoorDash, Uber Eats, Grubhub) are marketplaces. They bring new-customer discovery, but they charge 15–30% commission on every order. On a $40 order, you net roughly $28–$34 after their cut.
Direct ordering is your own branded link or website. You keep the full sale minus standard payment processing, which runs about 2.6–3.5% per transaction. That same $40 order nets you approximately $38.60.
The math is clear. But the bigger issue is customer data. Aggregators own the customer relationship. You never get the contact information. Direct ordering gives you the data to market to repeat buyers through email, SMS, or a loyalty program, and to build customer relationships that survive a platform switching off its promotions.
Practical recommendation: stand up direct ordering first as your primary channel, then use aggregators for new-customer discovery. If you're already on aggregators, treat direct ordering as a parallel channel. The goal is to migrate loyal, repeat customers to the commission-free channel over time. Aggregators are a valid acquisition tool. They're a bad long-term home for your best customers.
Step 1: Choose a POS system that works with your kitchen, not against it
This is the decision that every setup guide skips, and it's the one that determines whether an online ordering system helps or hurts your kitchen.
The ticket flow problem
If your POS system doesn't route online orders directly to the kitchen, every web order has to be manually re-entered by a staff member. That creates ticket flow errors, missed orders during rushes, and one overwhelmed employee watching multiple screens instead of running food.
This is what operators call “tablet hell”: one tablet per delivery app, a separate POS, and a kitchen that has no idea which order to prioritize. It's not a workflow problem. It's a system design problem.
What good looks like
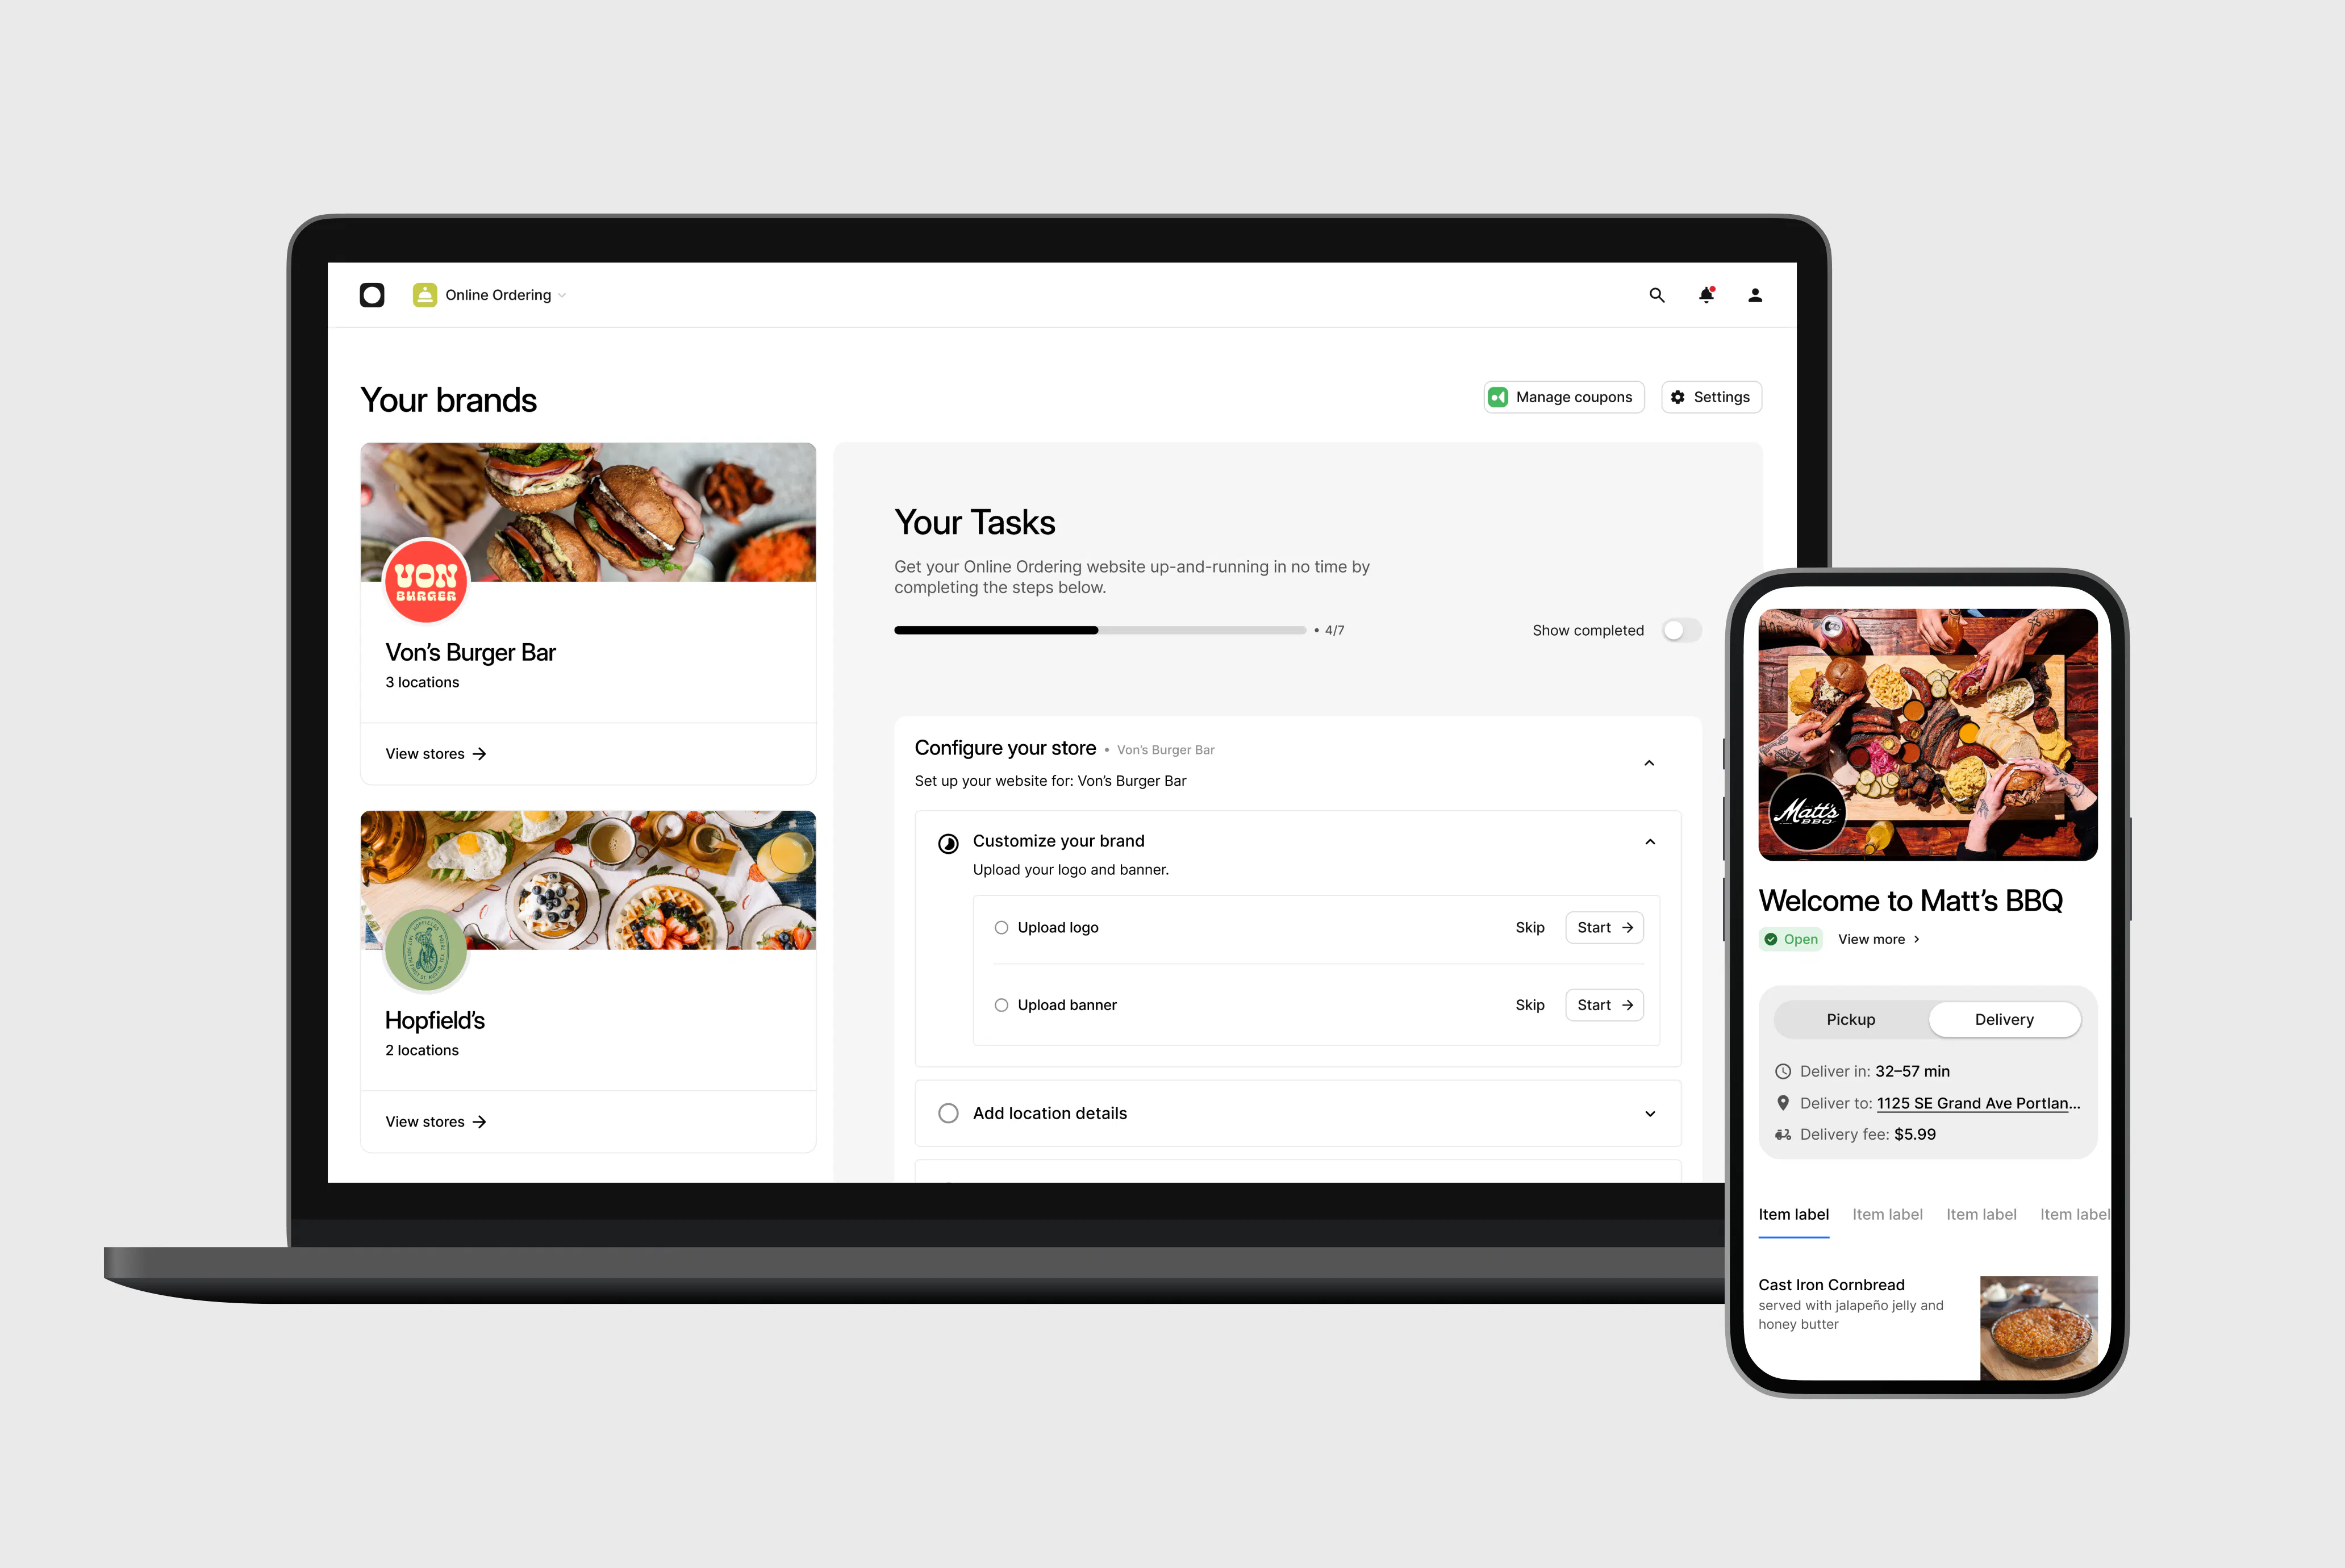
A POS system where online orders, in-store orders, and delivery-app orders all flow into a single dashboard through Otter's Order Manager, and print automatically in the kitchen, whether on a printer or a kitchen display system (KDS), without manual input from anyone. That's clean ticket flow.
Otter is a restaurant POS with built-in online ordering and menu sync across all your channels. Web orders print in the kitchen alongside in-store tickets automatically. No second screen, no re-entry.
“No one was yelling back to the kitchen anymore or taking time to punch orders into the POS system, we weren't missing orders, and the support was second to none.”
Ali Alsubai, co-owner of Brooklyn's Yemen Café, on switching to Otter after years of juggling four or five delivery tablets. Read the full Yemen Café story.
Evaluation checklist for any online ordering system
Before you commit, ask these four questions:
- Do orders print automatically in the kitchen, or does someone have to enter them?
- Is there one dashboard for all order sources, including in-store, direct online, and delivery apps?
- Do I need a developer or IT help to get started?
- What support is available if something breaks mid-rush?
The right POS system should feel like filling out a form. If the answer to question 3 is “yes,” keep looking.
See how Otter routes every online order straight to your kitchen, no extra tablet, no manual re-entry.
Step 3: Configure hours, prep times, and pickup or delivery fulfillment settings
This is where most operators under-invest before launch, and where the first wave of bad reviews comes from.
Hours
Set online ordering hours conservatively at first. If your kitchen gets slammed in the last 30 minutes before close, end online ordering 30 minutes early. You can always expand hours once you know your capacity.
Prep time buffers
Add five to ten extra minutes to your quoted pickup time for the first two weeks. Customers forgive a 25-minute wait. They don't forgive missing a 15-minute promise by 10 minutes. Adjust based on real ticket data after week one.
Pickup vs. delivery fulfillment settings
If you don't have dedicated delivery staffing, launch pickup-only. A bad delivery experience in week one sets a negative tone that's hard to reverse. If you do offer in-house delivery, start with a one-to-two-mile local delivery radius in your fulfillment settings and confirm your packaging holds food quality over that distance before expanding.
Payment and order confirmation
Confirm your platform accepts the payment options your customers already use, including major cards and contactless options like Google Pay and Apple Pay, and that it collects payment when the order is placed, not on pickup. Collecting at order time reduces no-shows and removes an awkward transaction at the counter. Set up automated confirmation messages (text or email) so customers know their order was received. That one setting alone cuts the “did you get my order?” calls, a real time cost for small teams.
Gift cards
If you sell gift cards, verify before launch that they can be applied to online orders. This is a common gap that frustrates loyal customers at checkout.
Step 4: Add your ordering link to your website and Google Business Profile
Your ordering link is useless if customers can't find it in three seconds. This step is about placement, not just existence.
Website button placement
The “Order Now” button must be above the fold on both desktop and mobile. If a visitor has to scroll to find it, you're losing orders before they start.
If you don't have a restaurant website yet
Some operators build their ordering page through a general website platform instead of their POS, using a WordPress plugin, Shopify, or Square Online. Any of these can work, but they mean maintaining your menu in a second place that doesn't automatically sync with your kitchen, the exact disconnected-systems problem raised earlier in this guide. Otter's Website Builder keeps your ordering page, menu, and POS on one system instead.
Mobile-friendly checkout
The majority of online restaurant orders are placed on mobile devices. Walk through your entire checkout flow on a smartphone before going live. Check button size, load speed, and whether your menu photos render correctly. A mobile-friendly experience isn't optional. It's where most of your orders will come from.
Google Business Profile
Add your direct ordering URL to the “Order online” section of your Google Business Profile. This surfaces a clickable button directly in Google Search and Maps, one of the highest-converting placements available to any independent restaurant, at zero cost. To add it: log into your GBP, select “Edit profile,” and navigate to the “Links” or “Order online” section.
SEO and social media
If your POS system creates a branded ordering page, make sure that page includes your restaurant name, cuisine type, neighborhood, and city. This helps it surface in Google Search when customers search “[restaurant name] order online” or “[cuisine type] delivery near me.”
Replace your generic website link in Instagram and Facebook with your direct ordering URL. “Order Here” in the bio converts better than “Visit our website” for any restaurant account.
Step 5: Promote your ordering link before and after launch
Customers will not magically discover your ordering link. You have to guide them there, across every channel they already use, repeatedly.
In-store promotion
Table tents, receipt footers, window clings near the register, and QR code ordering signage that points directly to the ordering page. A customer who visits today is your best candidate for an online order next week.
Counter staff verbal prompts
Train every front-of-house employee to mention the ordering link during checkout. One verbal mention per transaction is worth more than a dozen social posts.
Social media
Post your ordering link at least once a week, not just at launch. Show the ordering experience (a quick screen recording of the checkout flow works well), not just food photos. Use Instagram Stories with a link sticker pointing directly to checkout.
Email and SMS
If you have any customer contact list, send a launch announcement. A simple “order online now, no app required” message to 200 regulars can generate your first 20–30 orders before a single new customer discovers you.
Google Posts
Publish a “Now accepting online orders” post on your Google Business Profile with your direct ordering URL. These posts surface in local search results and Maps listings.
Ongoing promotion cadence
The launch-week push matters, but consistent weekly touchpoints (a new item callout, a weekend special, a limited-time online-only offer) sustain volume after the initial announcement fades.
Your first two weeks live: what to monitor and what to adjust
Going live is not the endpoint. It's the starting line. The first two weeks give you the real data your setup decisions were guessing at.
Week-one checklist
Review these after your first five to seven days of live orders:
- Average ticket time. Are online orders taking longer to prepare than your quoted time? If yes, add five minutes to your prep time buffer immediately
- Zero-selling items. Any item with zero orders after seven days needs a closer look. Check whether it has a photo, is priced competitively, and is actually available
- Cart abandonment signals. If your platform reports customers starting orders but not completing them, look at modifier complexity and the number of steps between add-to-cart and confirmation
- Staff friction points. Ask your kitchen team what's creating confusion. Common early issues include modifiers printing in an unclear order and uncertainty about who owns an online order when it comes in
- Order error and refund rate. If more than 2–3% of orders required a correction or complaint, identify the pattern and address it before week two
Week-two adjustments
Tighten or expand pickup windows based on real ticket time data. Add photos to low-converting items. Remove persistent zero-sellers. Update prep times for any items that consistently miss their promised window.
Otter's Analytics dashboard surfaces order volume by source, ticket time data, and sales trends across all channels in one place, so you can see these patterns without pulling separate reports from each platform.
Realistic volume expectations
Most independent restaurants see modest volume in weeks one and two and meaningful, compounding growth in weeks three through six as promotion takes hold. Don't judge the channel by early performance.
The savings stack up with every repeat order you keep off the aggregator
Run the math one more time. A customer who orders twice a month at $35 through a 20% commission aggregator costs you roughly $168 a year in fees. That same customer ordering through your direct channel costs you approximately $29 in payment processing, using the higher end of the standard 2.6–3.5% processing range. The delta is about $139 per loyal customer, per year.
Multiply that by 50 regular customers. That's nearly $7,000 a year staying in your pocket instead of going to a marketplace.
The five steps in this guide are a one-time investment. The savings are recurring and compound with every repeat order from every customer who orders direct. The goal isn't to abandon aggregators. They're a valid acquisition channel. The goal is to capture the customer relationship after their first aggregator order and migrate repeat business to your direct channel over time.
You're not just setting up online ordering. You're building a sales channel you own, one where no platform can raise its commission rate, change its algorithm, or remove your listing.
Ready to take your first direct online order? Set up your restaurant's online ordering with Otter.
Frequently asked questions about how to set up online ordering
Do I need a developer or technical skills to set up online ordering?
No. The right POS system handles the technical setup for you. Menu upload, payment processing, and order routing all happen in the background. Setup should feel like filling out a form, not managing a software project.
How much does it cost?
Third-party aggregators charge 15–30% per order with no upfront fee, but that commission adds up quickly on volume. Direct ordering through a POS system typically involves a monthly subscription plus standard payment processing (roughly 2.6–3.5% per transaction). For most independents with regular repeat customers, direct ordering has a lower total annual cost once you have consistent order volume.
What is the difference between direct online ordering and third-party delivery apps?
Third-party aggregators bring new-customer discovery but charge a per-order commission and retain the customer data. Direct ordering is your own channel where you keep the full sale minus payment processing and maintain the customer relationship. Most restaurants benefit from running both, using aggregators for discovery and direct ordering for repeat business.
How long does setup take?
With a POS system that handles the technical work, most independent restaurants can go live within one to three days of starting. The biggest time investment is the menu upload: photographing and writing descriptions for each item. If you already have digital menu content and photos, the full setup can be completed in a few hours.
What menu items should I leave off my online ordering menu?
Remove items that don't travel well: anything that goes soggy in 10–15 minutes, complex plated dishes that require last-minute finishing, and items with components that need to stay separate during transit. Focus on high-margin items that hold temperature and photograph clearly.
Can I manage online orders without adding another tablet to my counter?
Yes, if your POS system has built-in online ordering with menu sync, orders route directly to your existing kitchen printer or kitchen display system. The problem arises when each delivery app requires its own tablet. Look for a single-system solution where all order sources appear in one place and your ticket flow stays clean.

Set up your restaurant's online ordering with Otter